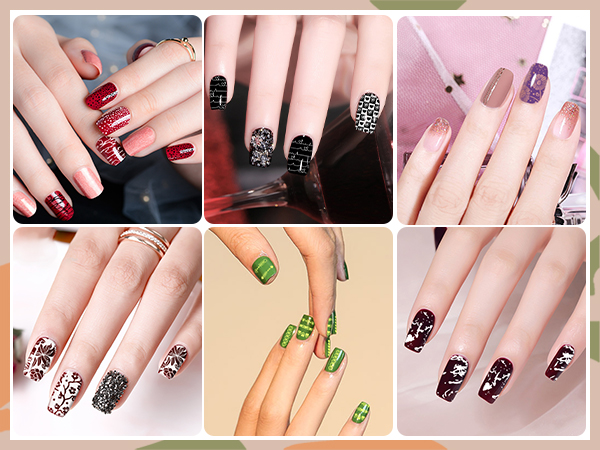
Tired of plain, single-color manicures but lack the steady hand of an artist? Enter nail stamping—the clever, creative, and surprisingly simple technique that lets anyone transfer intricate, professional-looking designs onto their nails in seconds. It’s the perfect bridge between basic polish and advanced freehand nail art.
What is Nail Stamping?
Nail stamping is a transfer technique using engraved metal plates, a silicone stamper, and special polish. Imagine a tiny tattoo for your nails: designs are etched onto a plate. When you scrape polish over the etching and press a soft stamper onto it, the design lifts cleanly. You then roll the stamper onto your nail, transferring the pattern perfectly. From delicate lace and geometric patterns to full-color florals and holiday themes, the possibilities are nearly endless. It’s a foolproof system that requires minimal artistic skill but delivers maximum visual impact.
Why You’ll Love Nail Stamping?
The benefits of this craft are compelling:
- Accessibility: It democratizes nail art. You don’t need a degree in fine arts; you just need the right tools and a little practice.
- Speed & Consistency: A complex design that would take 20 minutes to paint freehand can be stamped in under a minute. It also ensures every nail on both hands looks identical—no more “good hand, bad hand” syndrome.
- Endless Creativity: With thousands of stamping plates available, you can match your nails to seasons, holidays, outfits, or moods. You can layer designs, use multiple colors, and combine stamping with other techniques.
- Professional Results at Home: It creates crisp, opaque designs that look like they came from a high-end salon, saving you significant time and money in the long run.
Your Step-by-Step Guide to Perfect Stamping
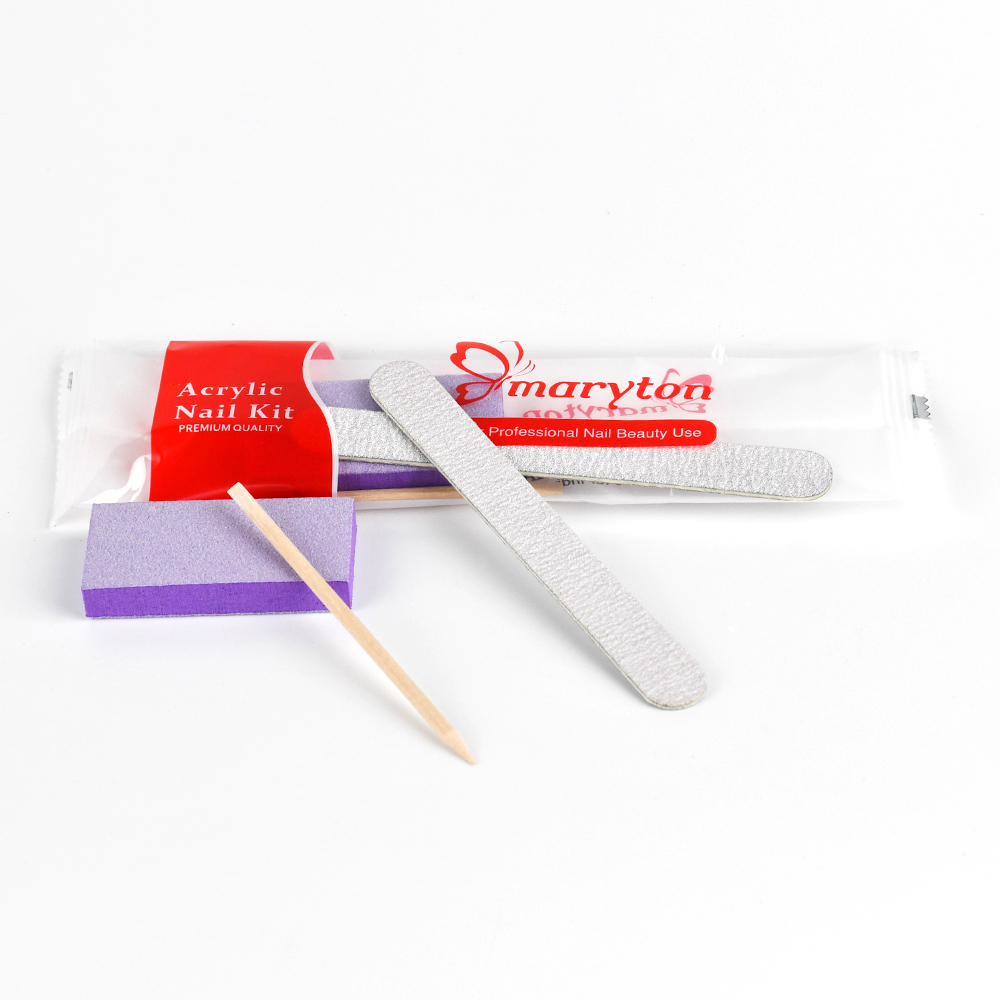
Ready to try? Gather your essentials: a manicure kit, a stamping plate, a scraper card, a stamping polish (regular polish is often too thin; specialized stamping polish is highly pigmented and fast-drying), and a silicone stamper.
1. Prep Your Canvas: Start with clean, dry nails. Apply a base coat and let it dry completely. A smooth, dry surface is non-negotiable for a clean transfer.
2. Prime the Plate: Choose your design. Apply a generous drop of your chosen stamping polish directly over the etched pattern.
3. Scrape: Hold your scraper at a 45-degree angle and swiftly scrape the polish across the plate, filling the etching with color. The goal is to remove excess polish from the plate’s surface, leaving it only in the grooves.
4. Pick Up: Immediately—speed is key—firmly roll your clean, dry stamper over the design. You should see the inked pattern lifted cleanly onto the stamper’s silicone head.
5. Transfer: Without hesitation, gently roll the loaded stamper across your prepared nail. Use a steady, rolling motion from side to side for full coverage. The design will now be on your nail.
6. Clean & Seal: Use a pointed cotton swab dipped in non-acetone polish remover to clean up any smudges around your nail edges. Once all nails are stamped and clean, lock everything in with a generous layer of fast-drying top coat. This crucial step seals the design and adds brilliant shine.
Maintaining Your Masterpiece
A stamped manicure can last as long as any quality polish job—if you care for it properly.
- Top Coat is Your Best Friend: Always seal with a good top coat, and consider reapplying a fresh layer every 2-3 days to protect the design from chips and wear.
- Glove Up: Wear gloves for household chores involving hot water, chemicals, or prolonged soaking.
- Mind Your Edges: Be gentle with your nails. Avoid using them as tools to open packages or scrape at surfaces.
- Quick Fixes: Minor chips can often be disguised with a tiny brush dipped in matching polish or a strategic new stamp over the area. For a grown-out look, you can sometimes file the design off the tip and re-stamp a French tip pattern over the regrowth.
In essence, nail stamping is more than a trend; it’s a smart, sustainable tool for personal expression. It turns a routine grooming task into a quick, satisfying creative session. With a small initial investment in tools, you open a door to a world of designs, letting you wear a different piece of intricate art on your fingertips every week. So grab a plate and a stamper—your mini art gallery awaits.
Read also: Cuts and Care: Your Complete Guide to Toenail Maintenance